IoTデバイスで測定したデータを、Googleスプレッドシートに保存したり、測定したデータに基づいてメール送信したりするために、「IFTTT」というWebサービスを使います。
IFTTTは、異なるWebサービス同士を、自動的に連携してくれるWebサービスで、無料で使用できます。
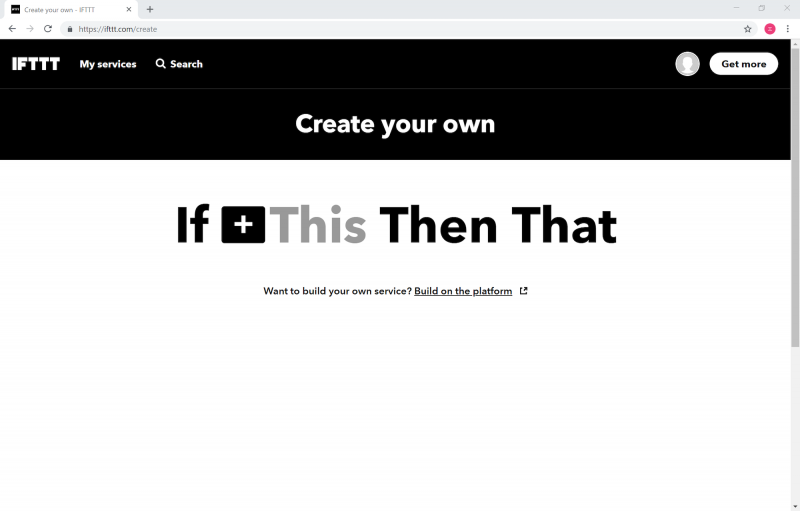
IFTTTは「IF This Then That」の略で、「もし、これをしたら、あれをする」という意味合いです。「This」と「That」にそれぞれ、所望のWebサービスを割り当てることで、プログラミングなどをせずに、例えば以下のような新しいサービスを作ることができます。
- スマホの位置情報サービスとメールを組み合わせて、乗換駅に着いたときに、自動で家族にメールを送信する。
- 特定のハッシュタグを付けたTwitterのつぶやきを、Facebookにも自動投稿する。
- Instagramに写真を投稿したときに、同時にDropboxにバックアップする。
また、IoTデバイスを、IFTTT内の他のWebサービスと連携させるために、IFTTTの「Webhooks」サービスを使います。
Webhooksは、Webリクエストを作成・受信できる任意のデバイスやアプリを、他のWebサービスと連携させるものです。
例えば、IoTデバイスは、データを測定したときに、Webリクエストを作成します。すると、それをWebhooksが受信し、他のWebサービス(たとえばGoogleスプレッドシート)に引き渡します。これにより、スプレッドシートに測定データを保存することができます。
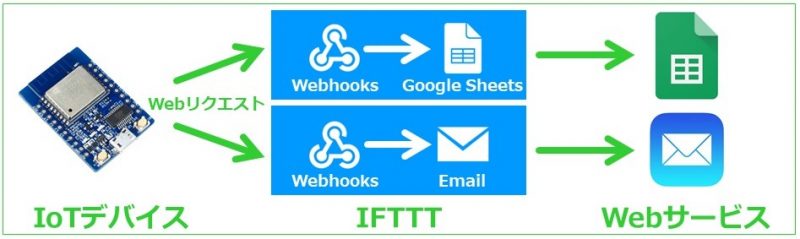
ここでは、IFTTTで、以下のふたつのアプレット(IFTTTに実施させる処理内容を定義したもの)を作成してみます。
- IoTデバイスからWebリクエストを受信したときに、Googleスプレッドシートにデータを追記する。
- IoTデバイスからWebリクエストを受信したときに、メールを送信する。
IFTTTアカウントの取得
まず最初に、IFTTTアカウントを取得します。
- ChromeなどのWebブラウザで、IFTTTのトップページ( https://ifttt.com )にアクセスします。
- 「Sign up」をクリックします。
- 「Or use your password to sign up or sign in」の「sign up」をクリックします。
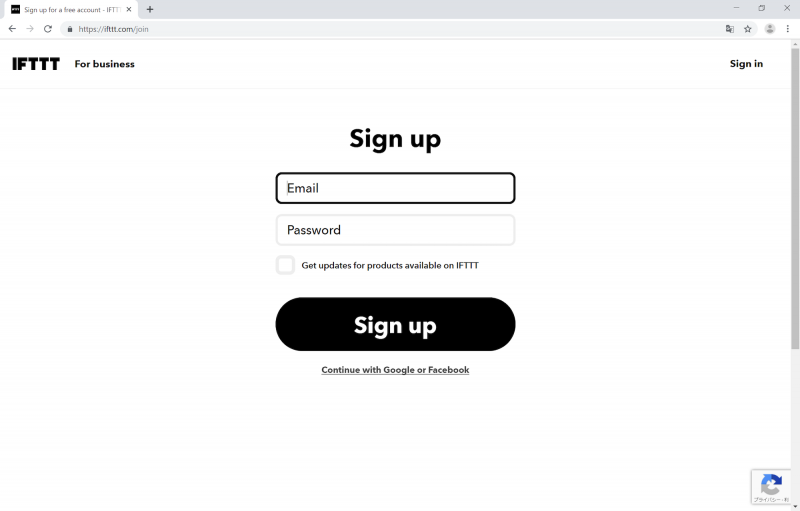
- メールアドレスとパスワードを入力して「Sign up」をクリックします。
これでIFTTTアカウントの取得は完了です。
アプレット作成1(スプレッドシート)
それでは、「IoTデバイスからWebリクエストを受信したときに、Googleスプレッドシートにデータを追記する」アプレットを作成します。
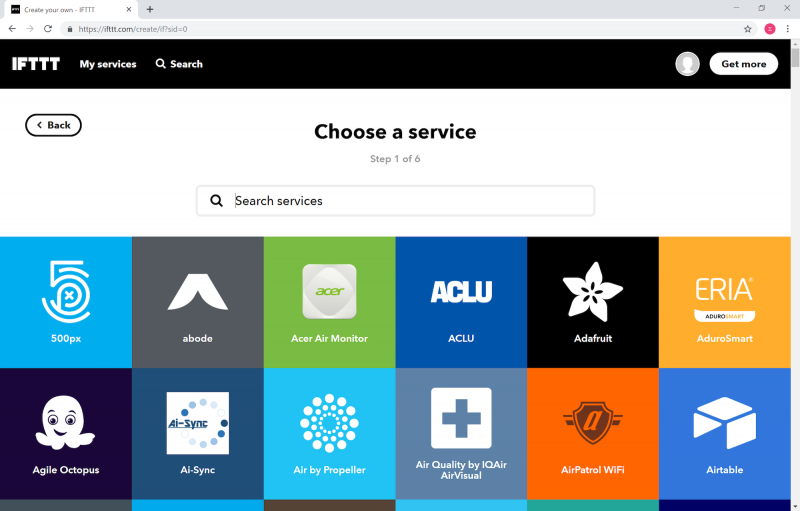
- 右上の顔型のアイコンで、「Create」をクリックします。

- 「This」をクリックします。
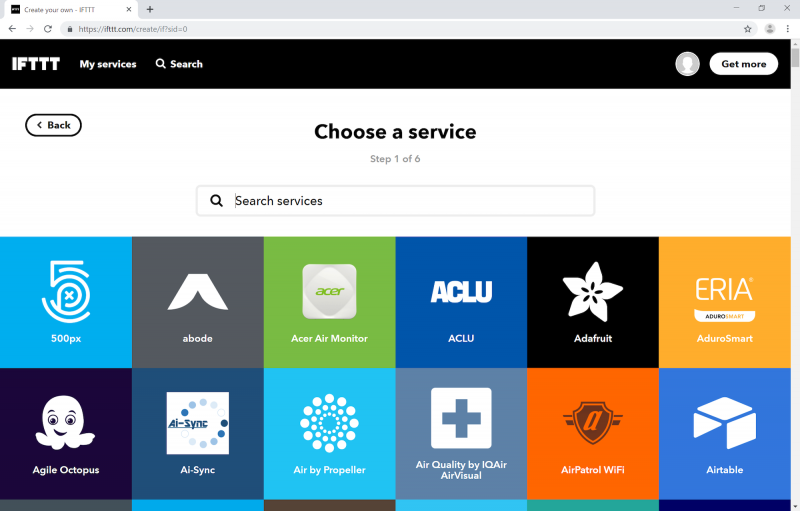
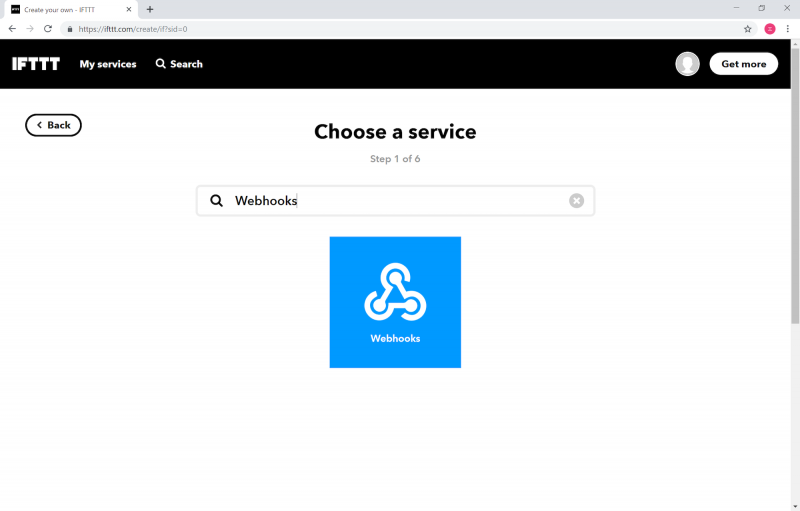
- 検索窓で「Webhooks」を検索します。
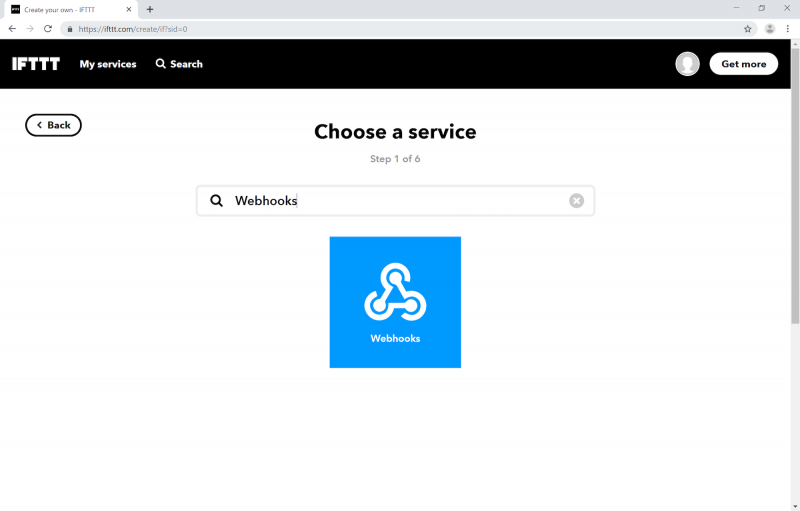
- 「Webhooks」をクリックします。
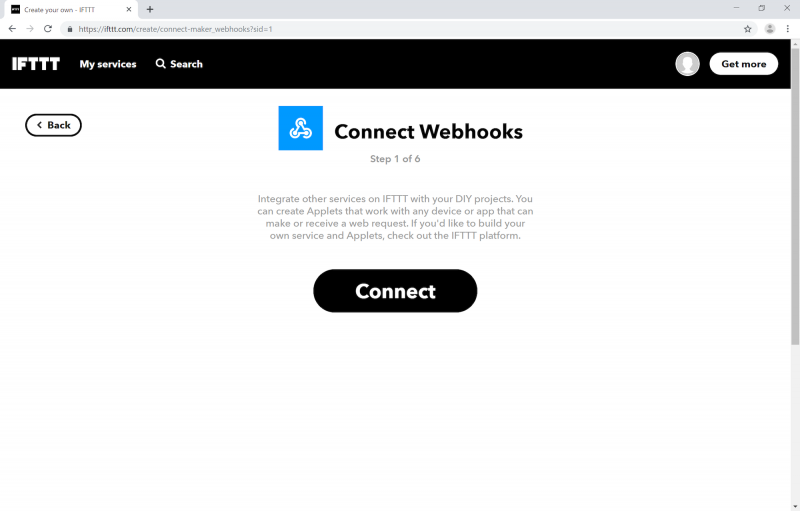
- 「Connect」をクリックします。

- 「Receive a web request」をクリックします。
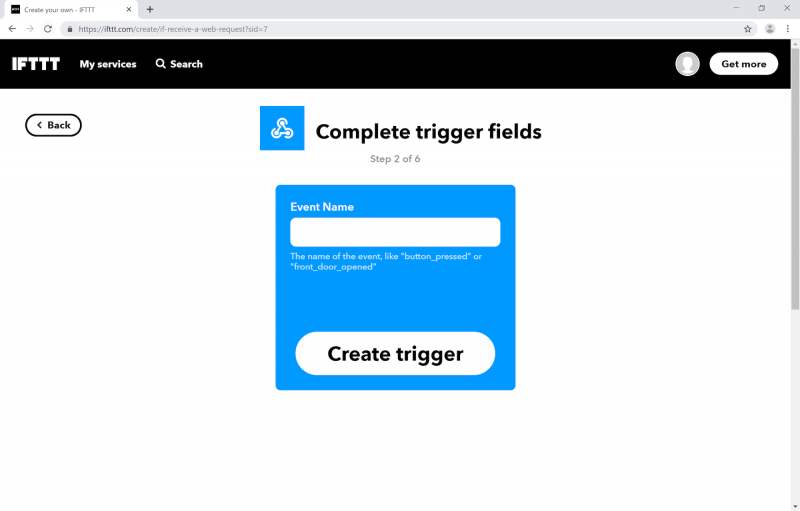
- 「Event Name」に「Send_to_Table」と入力して、「Create trigger」をクリックします。
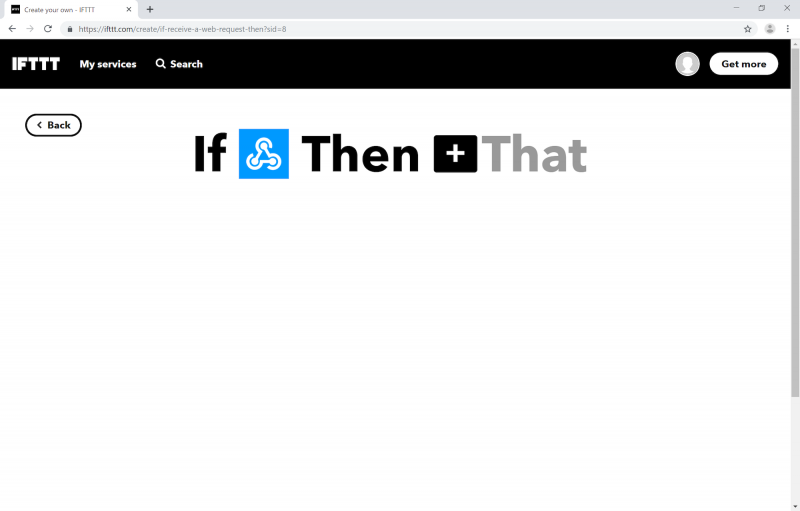
- 「That」をクリックします。
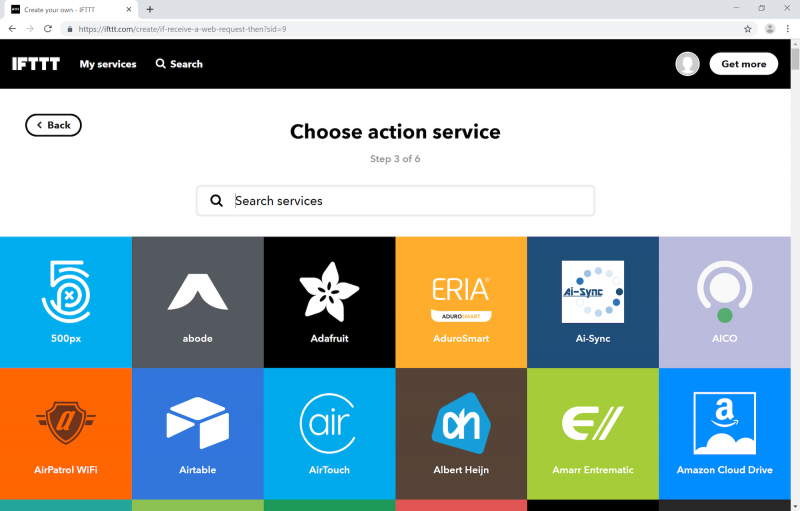
- 検索窓で「Google」を検索します。
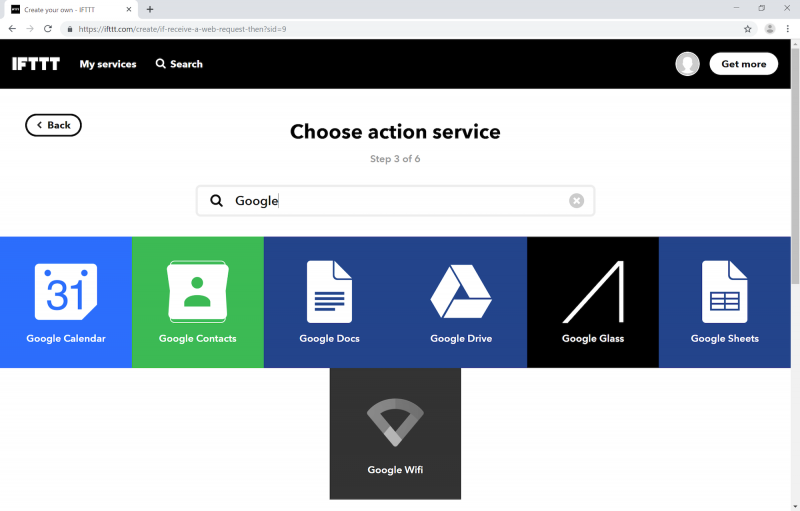
- 「Google Sheets」をクリックします。
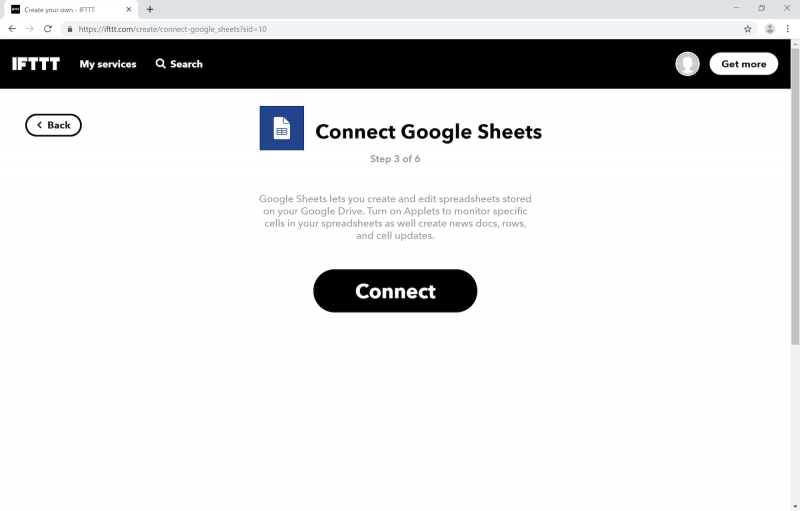
- 「Connect」をクリックします。
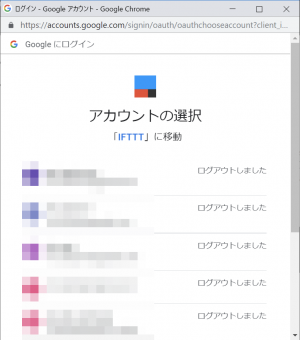
- スプレッドシートを作るGoogleアカウントを選択します。
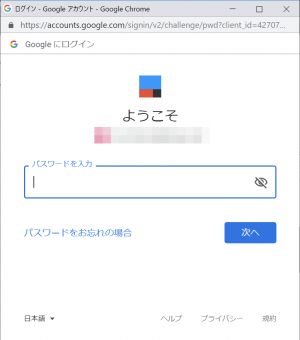
- パスワードを入力して「次へ」をクリックします。
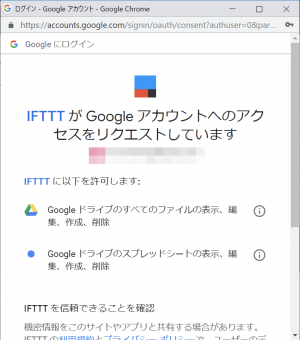
- 「IFTTTがGoogleアカウントへのアクセスをリクエストしています」と表示されますので、「許可」をクリックします。
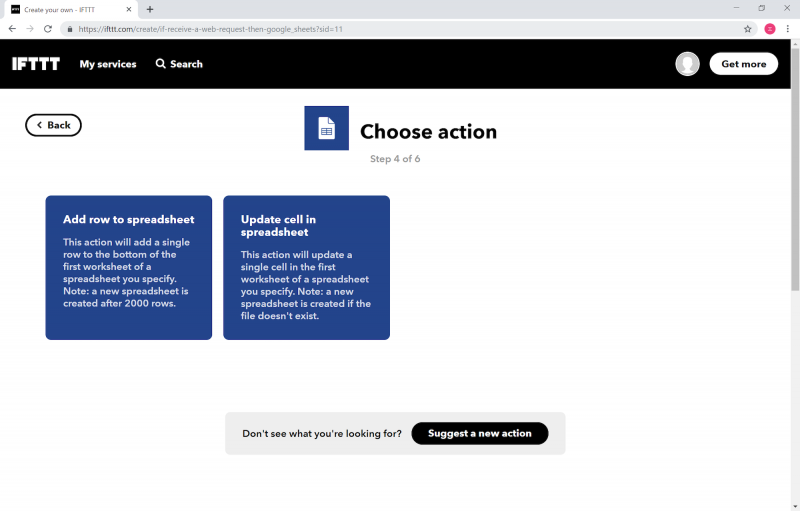
- 「Add row to spreadsheet」をクリックします。
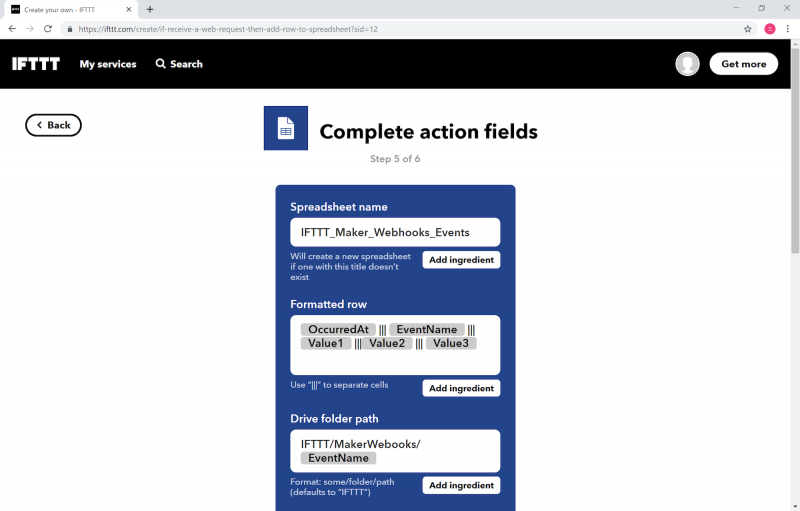
- 「Spreadsheet name」を「device01_table」に、「Formatted row」を「Value1 ||| OccurredAt ||| Value2」に、「Drive folder path」を「IFTTT/MakerWebhooks/EventName」に、それぞれ変更して、「Create action」をクリックします。
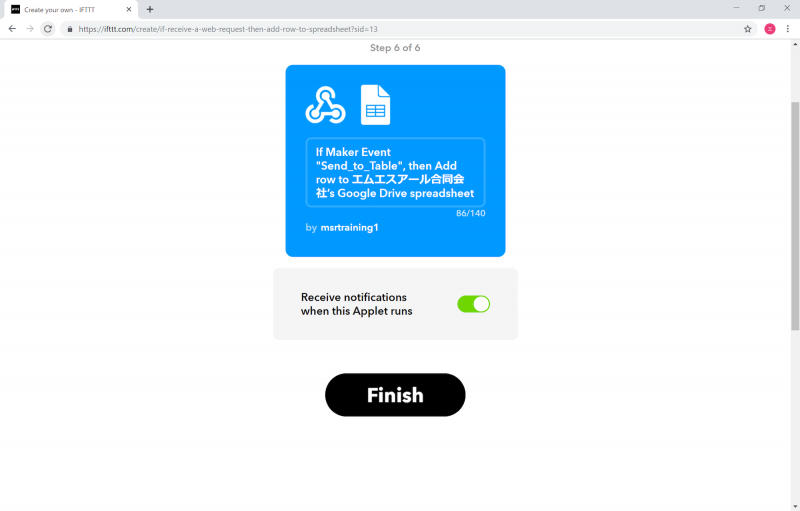
- 「Finish」をクリックします。
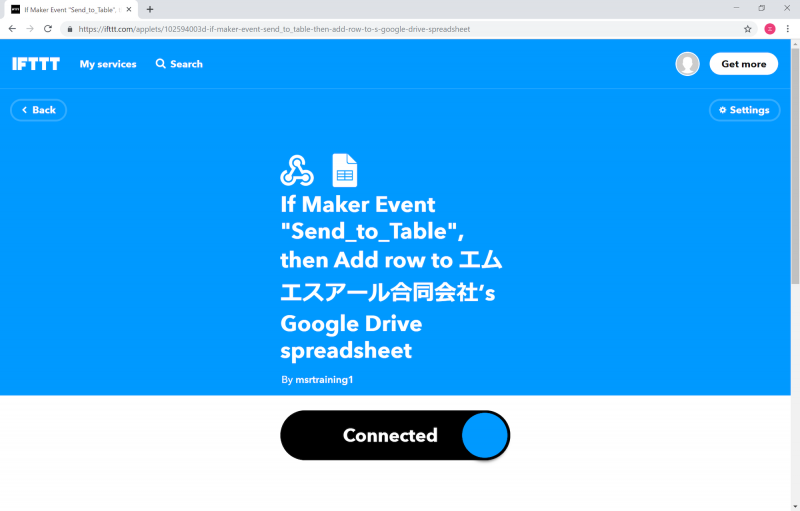
新しいアプレットができました。「Send_to_Table」という名前のWebリクエストを受信したときに、「device01_table」というファイル名のスプレッドシートに1行(受信時刻とふたつの値)追記するものです。
アプレット作成2(メール送信)
次に、「IoTデバイスからWebリクエストを受信したときに、メールを送信する」アプレットを作成します。
- 右上の顔型のアイコンで、「Create」をクリックします。
- 「This」をクリックします。
- 検索窓で「Webhooks」を検索します。
- 「Webhooks」をクリックします。
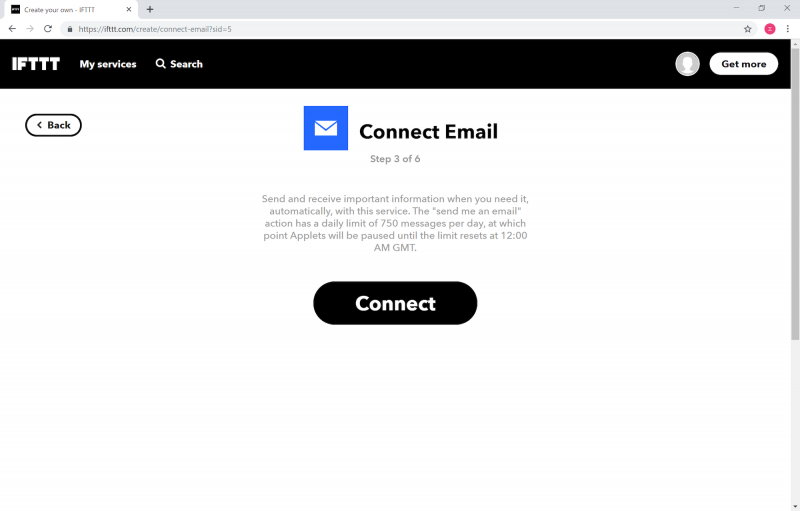
- 「Connect」をクリックします。

- 「Receive a web request」をクリックします。

- 「Event Name」に「Send_to_Mail」と入力して、「Create trigger」をクリックします。

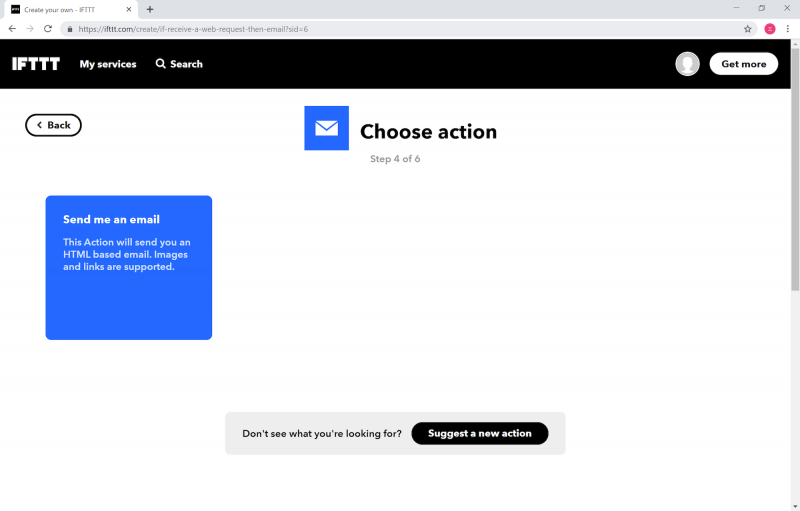
- 「That」をクリックします。

- 検索窓で「Email」を検索します。

- 「Email」をクリックします。
- 「Connect」をクリックします。
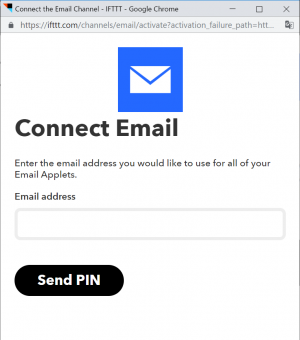
- 「Email address」を入力して、「Send PIN」をクリックします。

- メールでPIN(4桁の数字)が送られてくるので、それを「PIN」の欄に入力して、「Connect」をクリックします。
- 「Send me an email」をクリックします。

- 「Subject」を「赤ランプが点灯しました」に、「Body」を「Value1 の赤ランプが点灯しました<br> When: OccurredAt<br>」に、それぞれ変更して、「Create action」をクリックします。
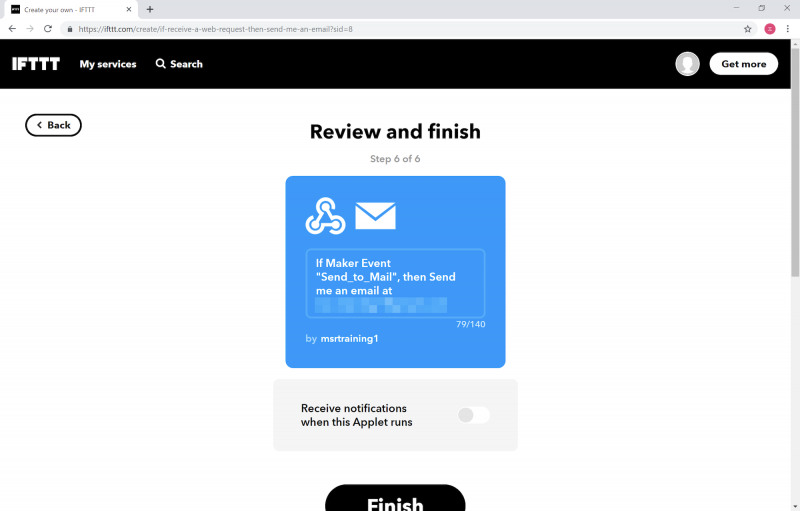
- 「Finish」をクリックします。
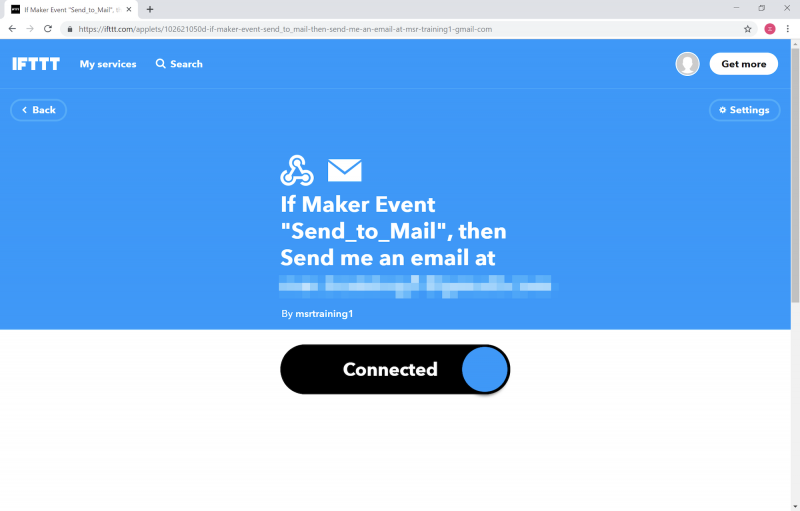
新しいアプレットができました。「Send_to_Mail」という名前のWebリクエストを受信したときに、自分のメールアドレスに「赤ランプが点灯しました」というタイトルのEmailを送信するものです。
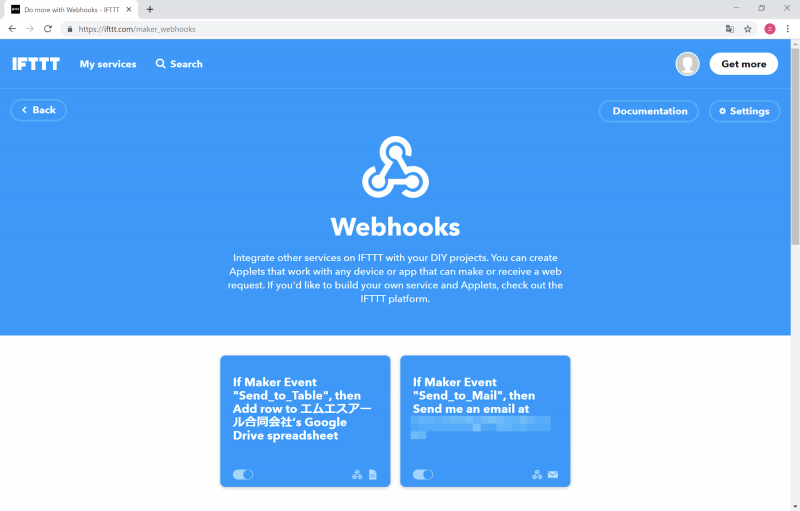
「My services」>「Webhooks」をクリックすると、今回作成したふたつのアプレットが一覧表示されます。
動作確認
作成したアプレットが、正しく動作することを確認します。
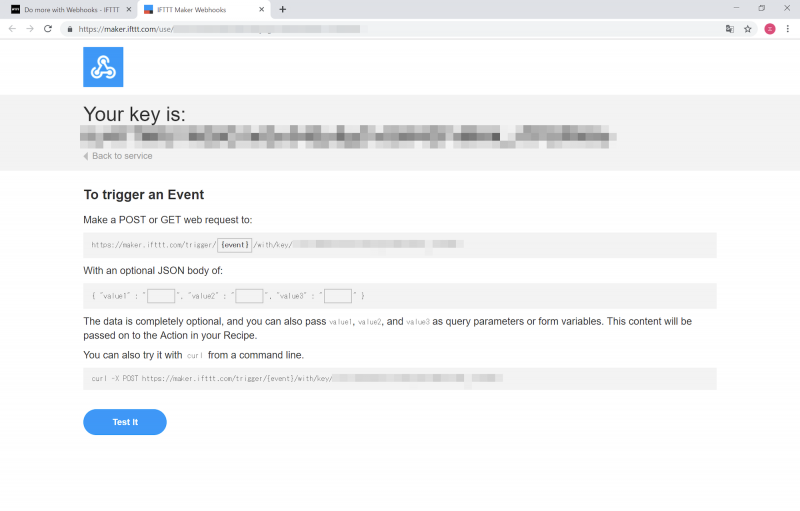
- 「My services」>「Webhooks」>「Documentation」をクリックします。
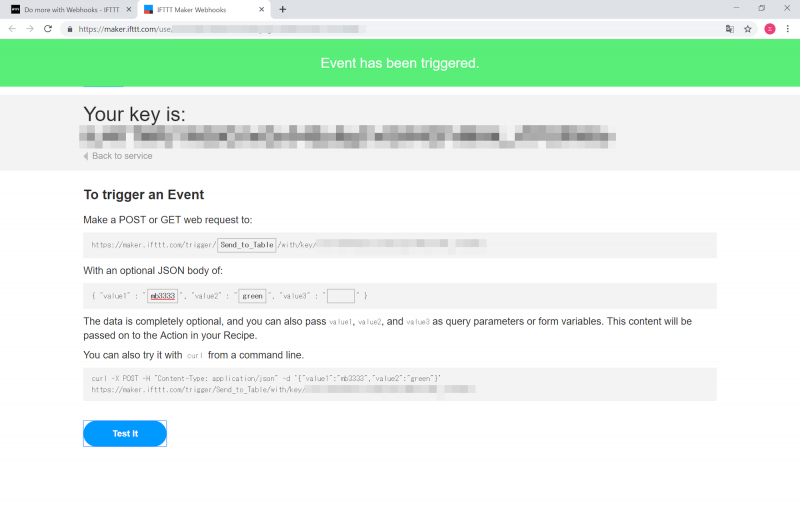
- 「{event}」に「Send_to_Table」を、「value1」に「mb1111」を、「value2」に「yellow」を、それぞれ入力して、「Test it」をクリックします。
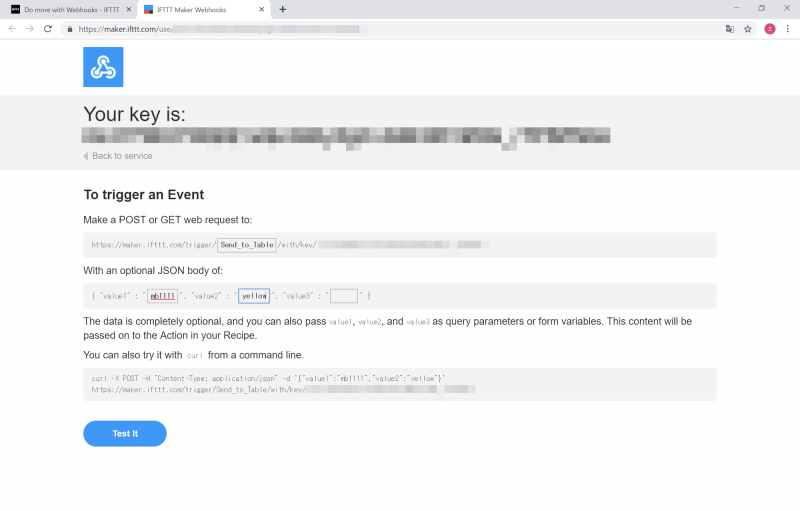
- 同様に、「value1」に「mb2222」を、「value2」に「red」を、それぞれ入力して「Test it」をクリック、「value1」に「mb3333」を、「value2」に「green」を、それぞれ入力して「Test it」をクリックします。それぞれの「Test it」をクリックした後は、「Event has been triggered.」と、メッセージが表示されます。
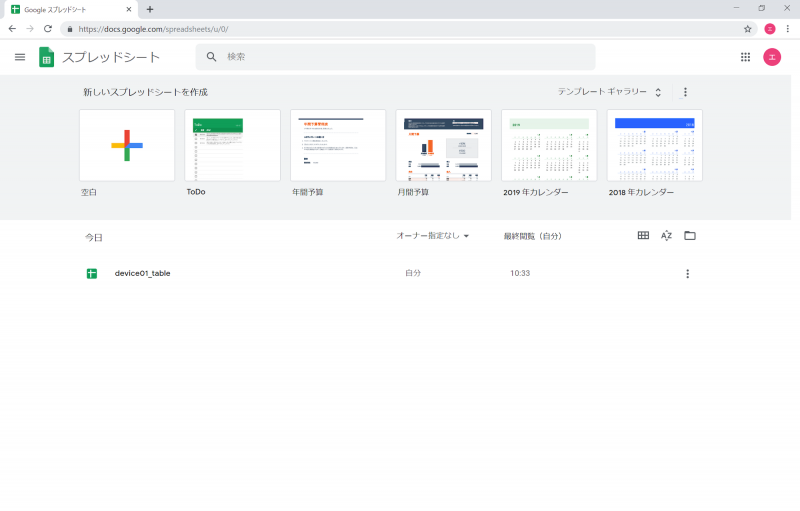
- Googleスプレッドシートのトップページ(https://sheets.google.com)にアクセスします。Googleアカウントにログインしていれば、自分のスプレッドシートページが開きます。「device01_table」という名前のファイルができています。
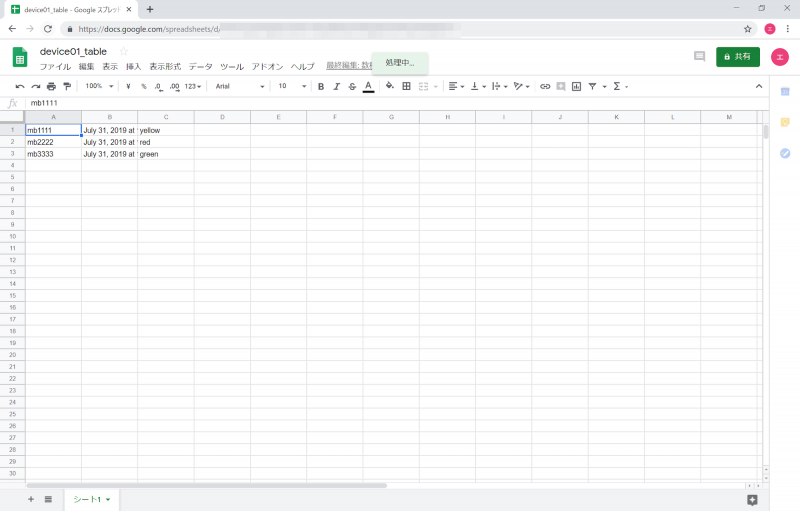
- 「device01_table」をクリックすると、スプレッドシートが開きます。先ほど「Test it」で送信したデータが、正しく書き込まれていることが確認できます。
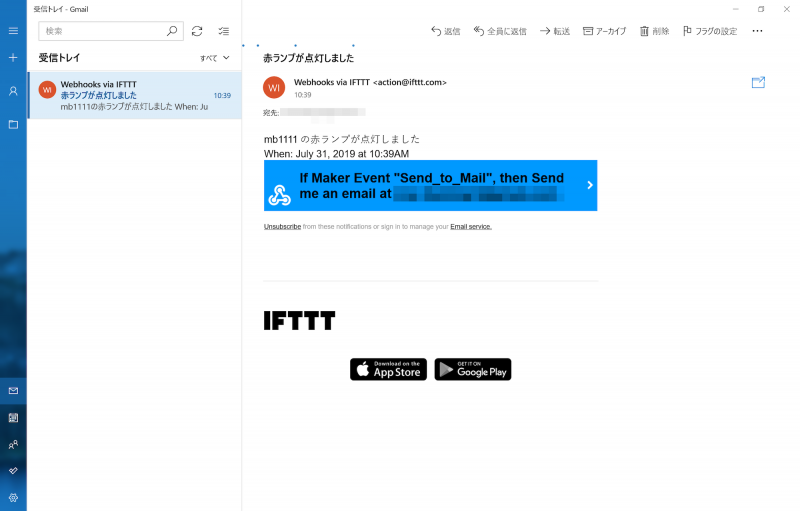
- 「{event}」に「Send_to_Mail」を、「value1」に「mb1111」を、「value2」に「red」を、それぞれ入力して、「Test it」をクリックします。
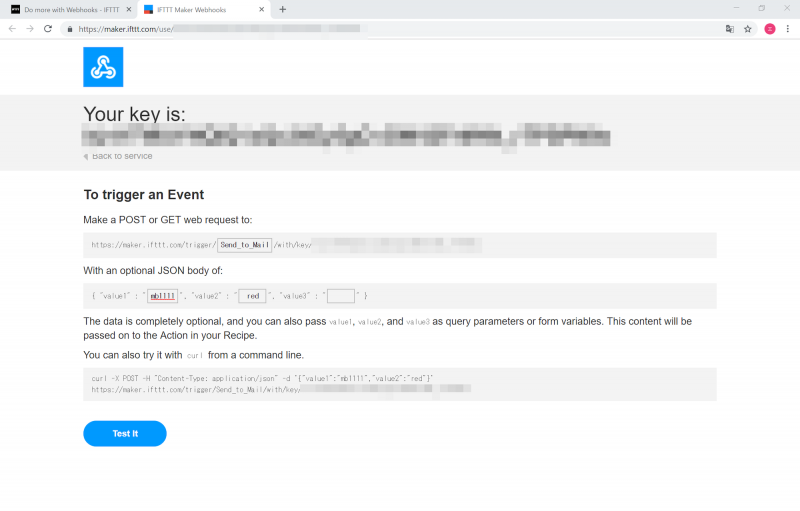
- メールをチェックすると、「赤ランプが点灯しました」というタイトルのEmailが届いていることが確認できます。
以上で、作成したアプレットが、正しく動作することを確認できました。